
Enable VNC on Ubuntu Desktop
Enabling VNC on Ubuntu is really easy and most articles out there on the internet show you just that. If you actually want to access your Ubuntu macine over VNC there is more to it. This article will show you how.
Trying to enable and access your Ubuntu graphical environment via VNC can be a little challenging. Ubuntu takes security serious enforcing encryption for VNC connections. In my search to enable using VNC for remote management I found many suggestions that suggested you to install additional Graphical Server software etc, etc. Many of these suggestions did not work or gave me unsatisfying results.
I want to use VNC on my own LAN and not over the internet unless via a VPN. To achieve that connectivity without encryption you only need to install a little tool for ease of use for modifying one setting. The rest is out of the box in Ubuntu available.
Steps to enable VNC screen sharing:
Step 1. Enable screen sharing through the GUI
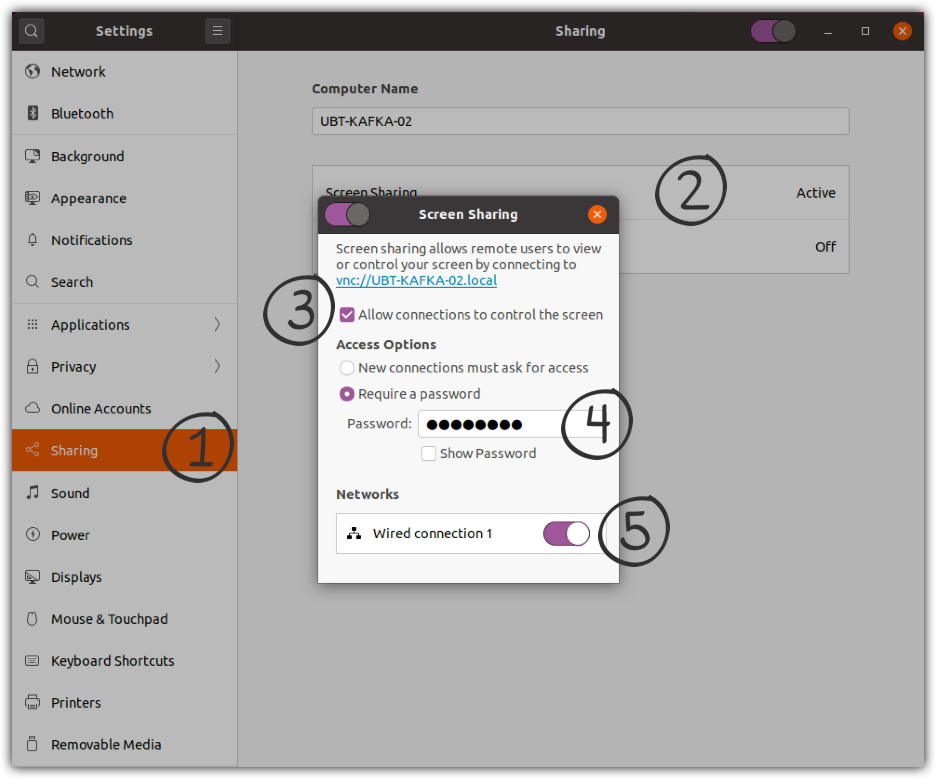
From the settings window
- Click on Sharing
- Click on Screen Sharing
- Select Allow connections to control the screen
- Under Access Options, select Require a password and provide a password
- Enable under Networks on what Network the screen sharing should be enabled
Step 2. From a terminal install the dconf-editor and start it
1
2
3
4
5
# Installing the dconf-editor:
sudo apt update && sudo apt-get install -y dconf-editor

# Starting the dconf-editor:
dconf-editor
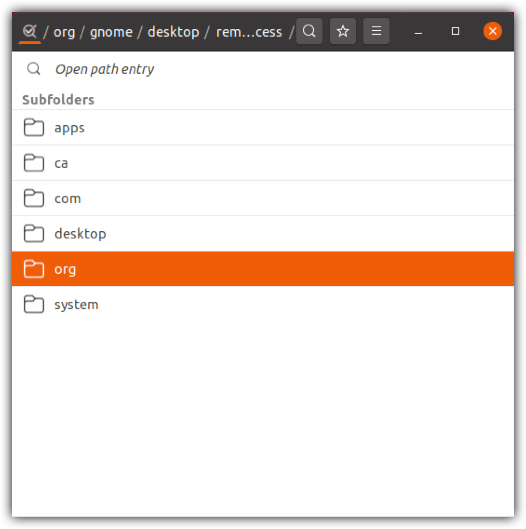
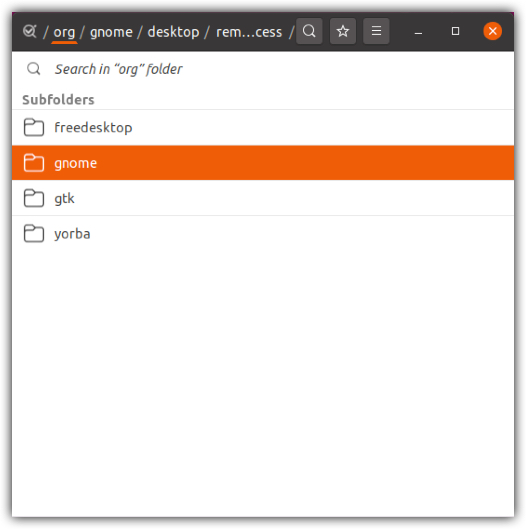
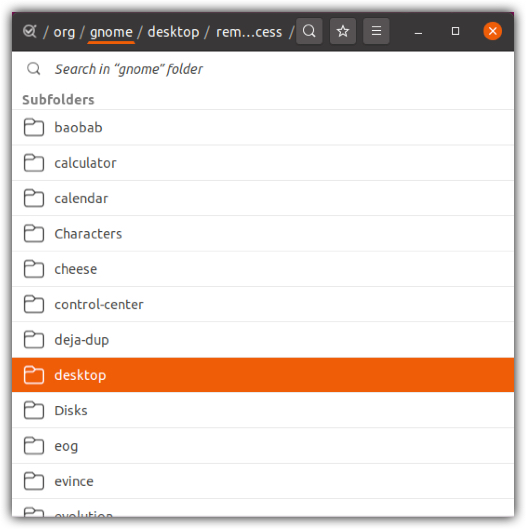
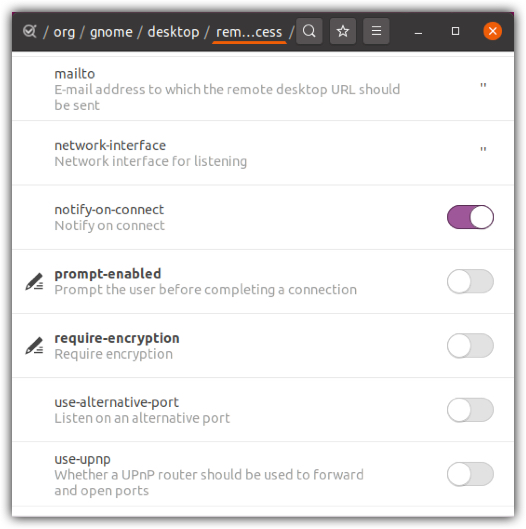
Step 3. In the dconf-editor window natigate to the following:
-
ORG GNOME DESKTOP REMOTE ACCESS - Then find the
Require Encryptionsetting and toggle it off as shown below
Here are the pictures how it looks:

Done. You can now open you VNC client from another computer and connect to this screen.